Showing posts with label Knitting. Show all posts

Sunday, February 10, 2013

Border for the Above

Or

Part two of "Laurel Leaves of the Wooly Sort"


In "Laurel Leaves of the Wooly Sort" I looked at translating finicky, or should I say mucked up, stitch patterns. Immediately after "Laural Leaf" Elizabeth Jackson offered up a border, as with Laurel Leaf the border pattern needs some creative fixing.

The pattern from The Practical Companion to the Work Table :


The most obvious problems...
"Take up stitches", how many, how? How many is a complicated question. Pick your preferred method for picking up, I'll look at how many later.
Row 5, where is row 5? See the last bit on row 4, that is row 5.
"cast one on" in the middle of a row? Use a yarn over
"and so on", for how long? As long as you like, but see my warning later.

Why are her patterns so wacky? There are three types of knitting books in the 19th century: a small handful with original content, a great many of reprints of those retitled and with different publishers, and a handful of mashups. Elizabeth Jackson "wrote" a mashup, she took patterns from other sources and compiled them into one book. Unlike most who stole content from others she rewrote them. I haven't taken the time to do a pattern by pattern analysis of the book but I know some of the patterns came from earlier works of Jane Gaugain. In rewriting the patterns she was inconsistent in her notation. While you certainly could do a cast on mid-row it's unusual unless you are doing many. She used at least three different terms in places I would expect a plain old yarn over. She also either mucked up the math as she rewrote or she was just plain bad in math.

Making this pattern do something, preferably something pretty...
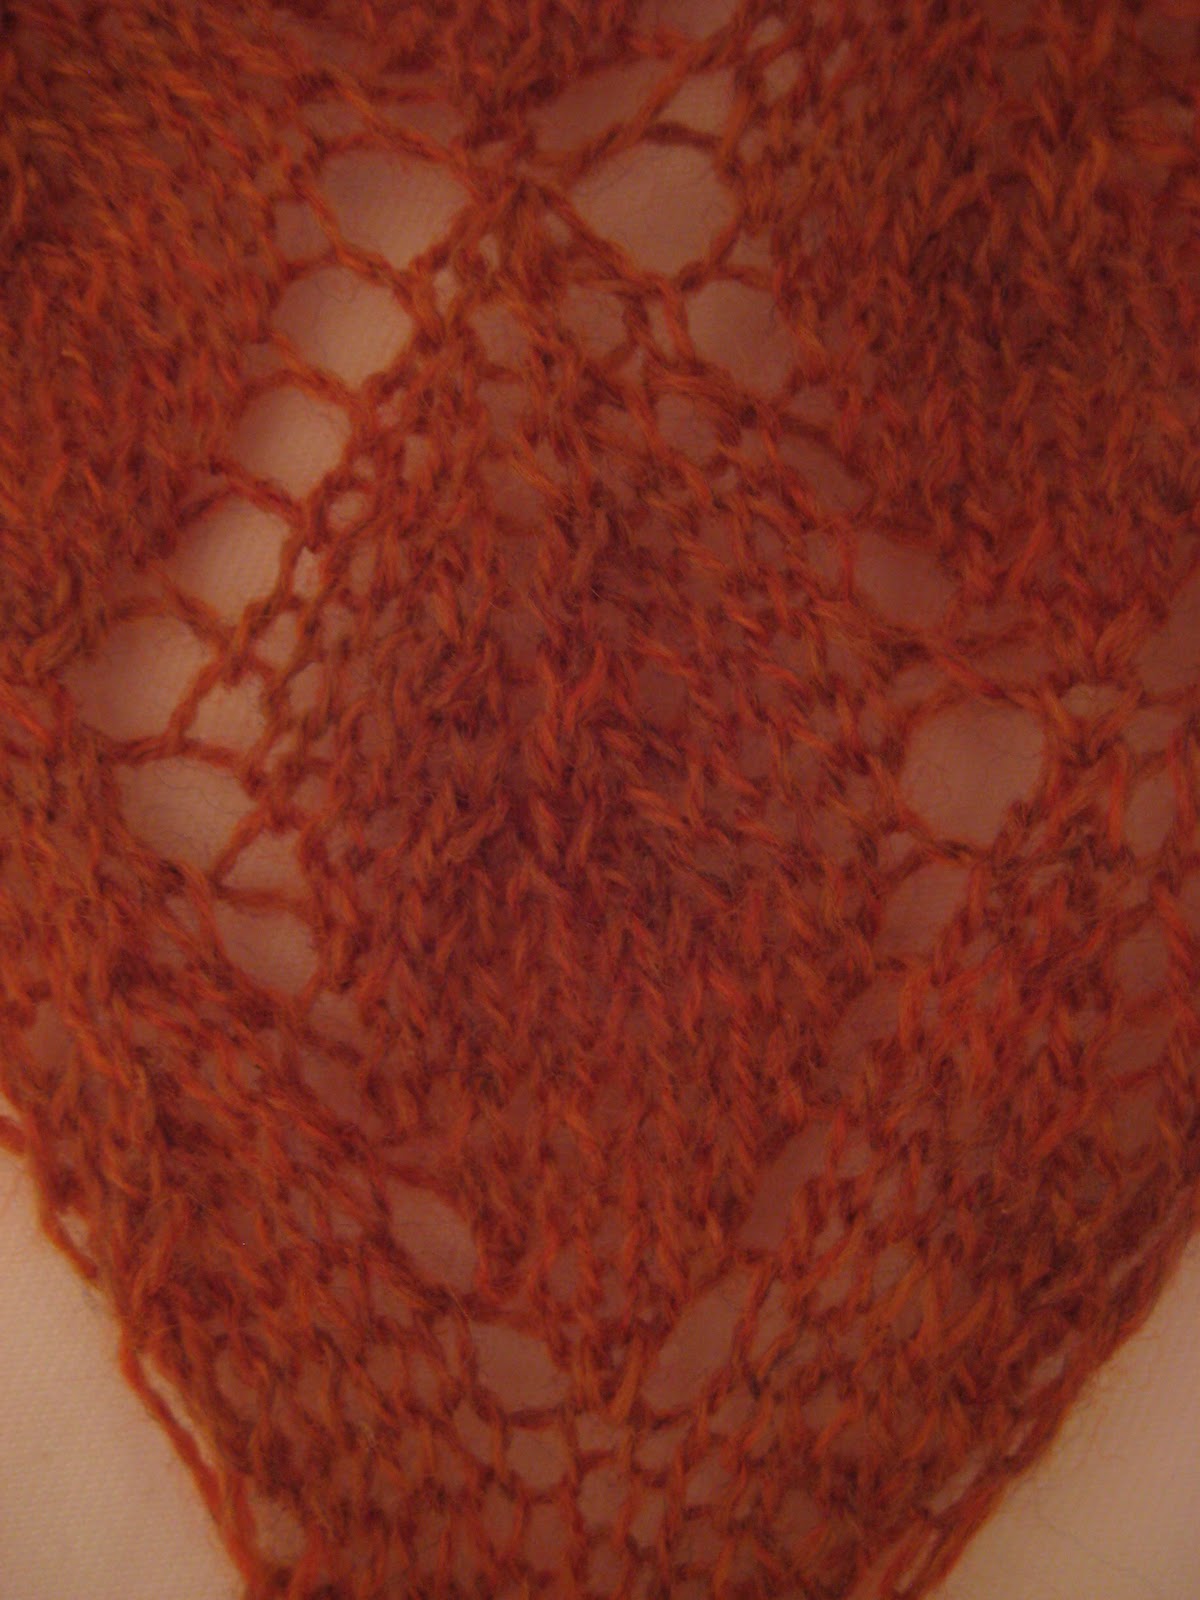
The first three rows are just foundation or setup rows the pattern itself is rows 4 - 7 which keep repeating. 4 (and again as 8) is the only real pattern row, that makes this an easy pattern to work, well, once you make it work. Sometimes her use of semi colons offer clues about what she means and which stitches should be grouped together, consistency is a problem though. She muddles this but not too badly, just oddly. If you look closely she repeats the pattern but in an odd way, not writing the instructions the same for both repeats and splitting it. She does "narrow three times" four times, so if this is two repeats we need two of them and one each of the other two sets of stitches, the middle of her line (highlighted in green) turns out to be one repeat. What gets repeated five more times? Everything from the preceding ";", so yarn over knit one. Am I sure? Well, if we're going to keep repeating the same pattern row we need to keep the same number of stitches in every row. If we "narrow three times" twice we've decreased 6 stitches so we also need to increase 6 stitches. Buried in her wonky writing is a very common variation of "Feather and Fan" which has a plain stitch in the center of the decrease section. I may have caught what was going on here more quickly than some would. Feather and Fan was the first lace pattern I learned cough cough years ago. I can probably do it in my sleep, actually, I was accused of that once...

slip one, knit one, narrow three times; knit one, narrow three times; cast on one, knit one, repeat five more times; narrow three times; knit one, narrow three times; cast on one and knit one six times; repeat to the end of the row;

Rewritten:
S1 *k1, k2tog 3x's, (yo k1)6x's, k2tog 3x's* repeat to end of row
I would add one stitch at the end for better balance and a cleaner edge


For each repeat you need 19 stitches, then one or two for the S1 and k at the ends.
If you knit it in this order, instead of stacking the decreases to the one end as she wrote it, you'll have the same portion of the pattern at each corner of the shawl.

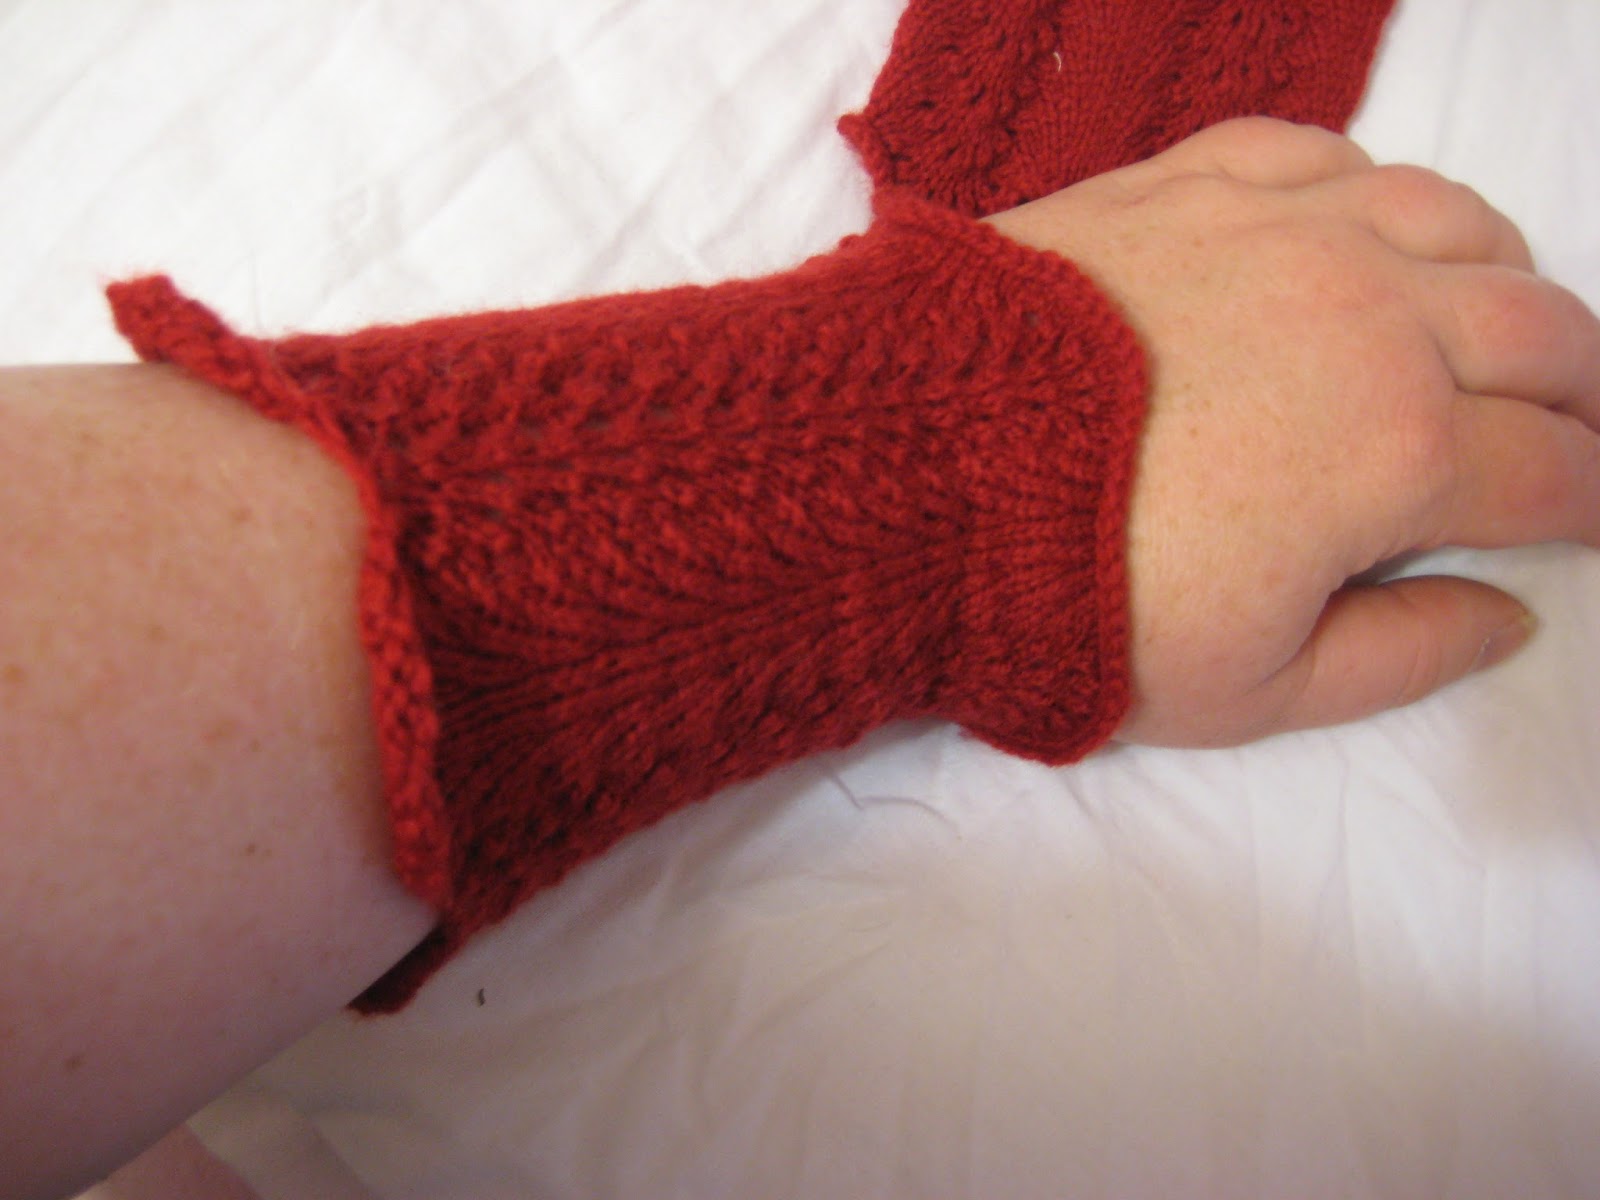
This pattern is pretty and easy to work for cuffs, scarves and even little knit miser's purses.


Take up stitches and row 2...
I'm really not sure what she was thinking. No matter how you read row 2 it will increase the number of stitches rather dramatically. Did she think knitters couldn't pick up enough stitches along the edge? Did she think the greater fulness gave some flexibility to let you pull out the scallops more to accentuate them? If her intention really was to increase from what was picked up to a number for the actual pattern she failed, epically. The increases in row 2 can be worked to match the stitches needed for row 4 for just one repeat then it doesn't work till you hit 5 repeats from there I don't know the next match, I stopped my "algebra exercises for knitters" at 10 repeats.  If this is what you think you want to do you can engineer it to work with a little math.

Slip the first stitch, cast one on, knit one, cast one on, knit two, repeat within one stitch of the end; cast one on, knit one.

The  repeating part is the "cast one on, knit two" and it has a cast one on at each end, and the slip one. So some number of yo, k2 with three extra stitches and every two stitches becomes three. But you need to do the math to make it work with the pattern repeat of 19 with 2 more.
If you picked up 100 on each side you have 200
200 after the row 2 increases would be 299 (it's not exactly 1.5 times because of those end stitches)
 19 goes into 299 15.736 times. 
huh...
You would have 15 repeats of the 19 stitch pattern and  14 extra stitches so you need to either skip 14 increases or add 5 more. I always opt for the closer number so I would add 5. You can evenly space them or, in this case, I would concentrate them in one spot. This pattern has you trying to fit a straight strip onto a triangle. That won't work. If you want it to sit nice and flat at the point you need to add more stitches around the corner to almost gather the border there. Then knit till it's as deep as you like, cast off loosely and you're done!

But...

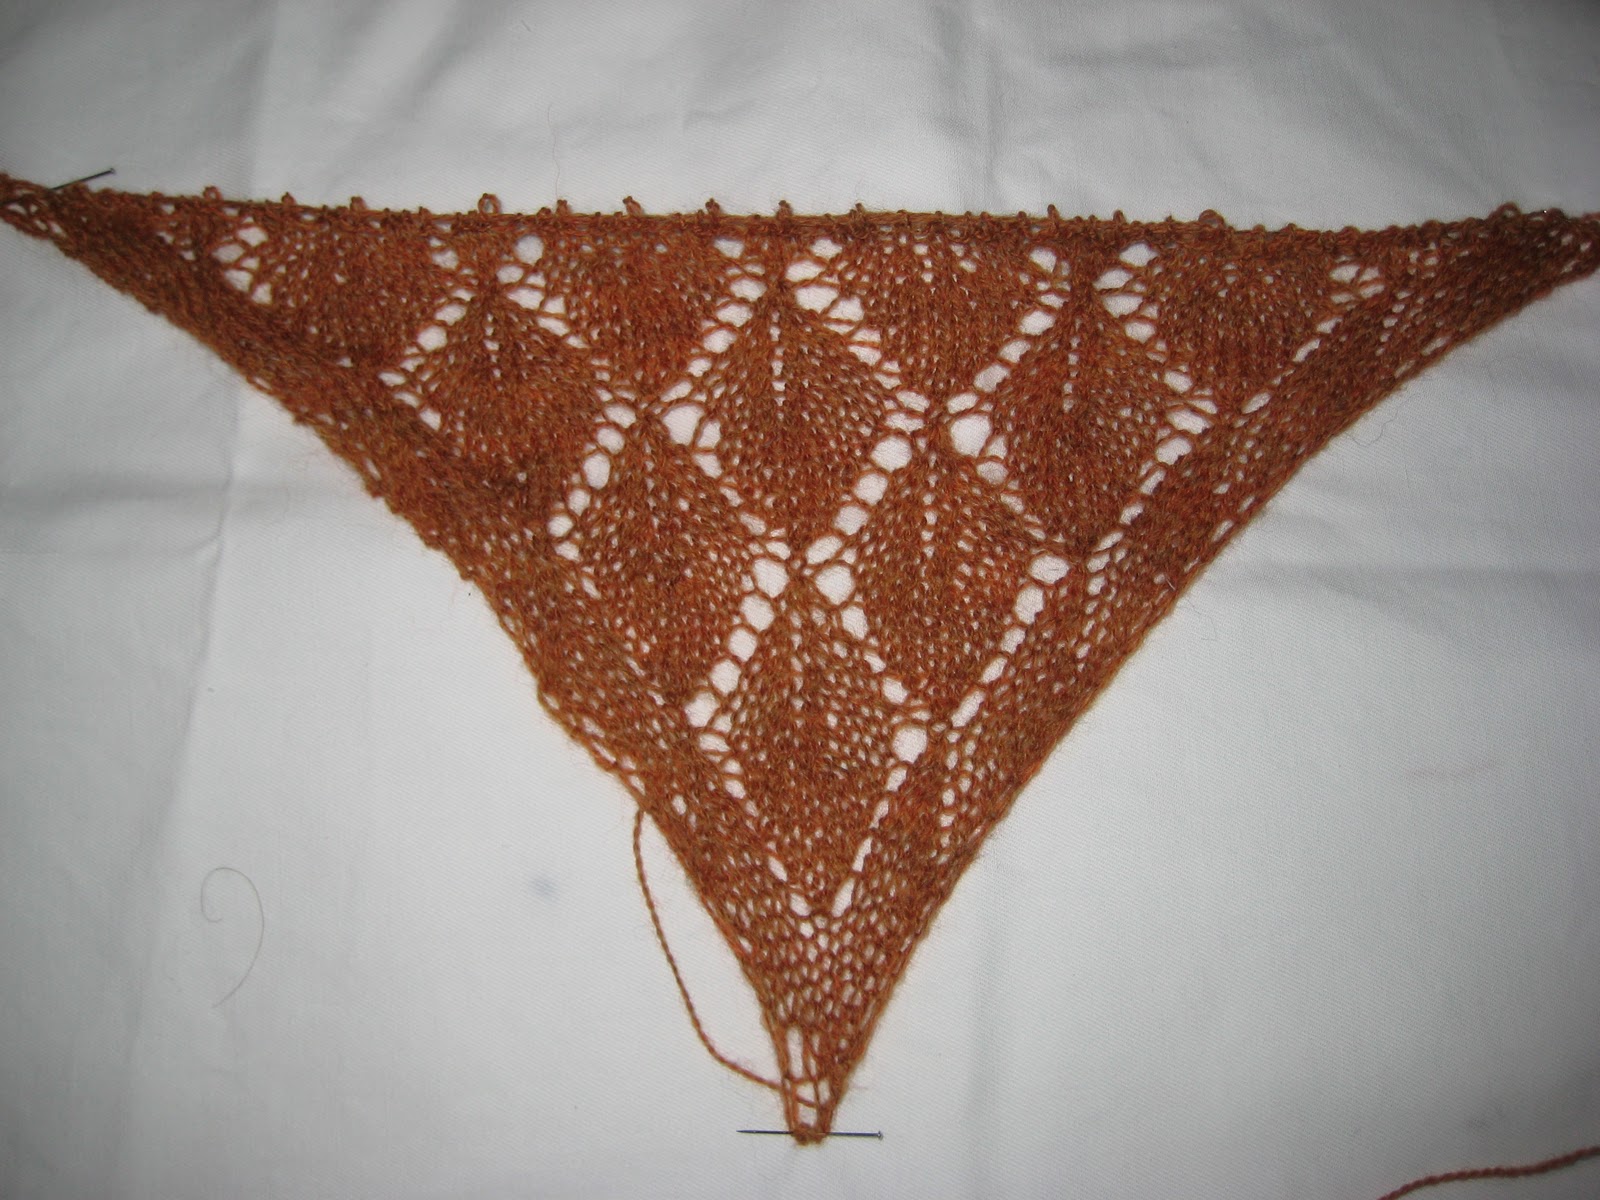
This border on this shawl kind of puzzles me. You usually see more narrow edgings knit in a long strip and  seamed on on half, or triangle, shalws. Those narrow strips are easy to manipulate around the corners. Feather and Fan variations show up frequently on Shetland-esque shawls as deep borders. The pattern really needs to be knit to a nice depth to visually develop and to make those edges to undulate deeply. The patterns for those shawls include increases at the corners to accommodate the shaping, avoiding the problem I mentioned above. Did Mrs. Jackson take the border from one shawl and try to put it onto another? And in her rewriting lost the shaping? Sometimes the Shetland type shawls had a row of yo k2tog between the main pattern and the borders just to help break the two patterns visually. Let's look again at the wonky row 2.

Slip the first stitch, cast one on, knit one, cast one on, knit two, repeat within one stitch of the end; cast one on, knit one.
 If you change the "cast one on, knit two" to "cast one on, knit two together" your stitch count remains stable except at the ends.
If you kept doing the start and end "cast one on, knit one" you would be increasing the two ends. If you worked the two sides as two separate and complete sections you would have 

increase - pattern - increase - increase - pattern - increase

The increases at the far ends would keep the border running in line with the top edge of the shawl while the double increase in the middle would nicely miter the corner.  
I'm pretty sure this is what she intended. I don't know why she rewrote the patterns she stole, others didn't seem to feel a need to. The rewriting seemed to constantly trip her up.

How I would work it:

Pick up stitches along the two outer edges, mark the center. This is all written for one side then repeat it on the second side.
Check the stitch count, if it's not divisible by 19 with  3 extra slip in some extra or decrease a few to make up the difference. It's often easiest to do that on the first row. If you picked up 100 stitches on each side you have 97 to work in the pattern. 5 repeats of the 19 stitches is 95. Just lose two that you picked up.

When you pearl the first row be sure that you are looking at the wrong side of the shawl


1. Pearl
2. S1, {yo, k1 *yo, k2tog* repeat to one stitch from the end, yo, k1}, repeat everything in curly bracket on the second side


3. Pearl

4. S1, {yo, k1, *k2tog 3x’s; (yo, k1) 6x’s, k2tog 3x’s k1* yo, k1} repeat everything in curly brackets on the second side

5. Pearl

6. S1 {yo, K to one stitch from the end, yo k1}, repeat everything in curly brackets on the second side

7.Pearl

8. same as 4

Repeat 4 - 7 to desired depth, cast off losely.

I don't have a swatch showing the miter, I'll try to get one done and posted.


Saturday, July 9, 2011

Mitts, Cuffs and Muffatees, Oh My!

Or
Everything Old is New Again

The past few years there has been a slow but growing trend for various forms of knit handwear, from short little mitts to long gauntlet like mitts, some with partial fingers, some a thumb hole and other just a long shoved down cuff. They are nothing new, I have been quite amused at the several "new and novel" items which have wound their way into "modern" knitting in the past few years. Various knit hand warming devices have been around for a long, long time. Their existence long predates my era of study. The first print instructions I know of appear in the 1838 Workwoman's Guide, http://books.google.com/books?id=8OcDAAAAQAAJ. WWG offered patterns for muffatees, mittens, andt mitts, in all 10 patterns, out numbered only by foot coverings. It tells you something about the life of our ancestors before central heat, staying warm was a struggle. WWG offered plain and utilitarian styles, but that was the gist of the whole book. Like all clothing items (at least it seems all) they transcended simple form and joined the ranks of fashion items. Many of the knitting books published in the next few decades offered more fanciful versions - fancy stitches, lacework, multicolored, anything to make the common item pretty. They persist in some form from one end of the Victorian era to the other. Which was favored - mitt versus cuff and so on - varied from era to era but they all had two things in common. They were knit on small needles (00-2) and they were knit on fine yarn (almost always) modern fingering weight . This is where they diverge from the modern versions. Modern knitters make them from heavy and chunky wools assuming that will keep them warm. But then modern people wear them to wander a chilly street while shopping not to try to run a household. The finer historic version lets the wearer layer, a muffatee could be slipped on over a thin glove to extra warmth without hampering hand use as a heavy item would and they can be worn for housework without destroying dexterity. Most stitches used provide some stretch and flexibility allowing for a snug fit, a loose and floppy will make them cumbersome to wear if you try to do any real work. 

They are small and knit up quickly, a great way to use up scraps of yarn, and a nice project which can let a newer knitter produce a finished project (relatively) quickly.  As a very visible costume item they also get noticed and are good conversation starter leading to conversations about not just knitting but the difficulties in keeping a house warm and trying to keep oneself warn while working outdoors. One word of caution if you want to knit some - many of the patterns end up rather small so swatch the pattern stitch and adjust the stitch count accordingly. You can try going up or down one needle size but unless your knitting is extremely tight or loose changing needle size more than that will alter the texture of the knitting too  much. Below are some pictured of some styles ranging through the Victorian era. All were knit for a knitting workshop I recently taught at the national ALHFAM conference.

 Knit Muffatee, Workwoman's Guide, 1838


Corkscrew Muffatee, Exercises in knitting, 1846 


Feather Mits, The ladies’ self instructor in millinery and mantua making, 1853


Winter Cuffs in Double Knitting, Godey’s Lady’s Book and Magazine, February 1861


Lady's  Mitten with Thumb, Weldon’s Practical Knitter, First Series. 188x


Knitted Cuffs, The art of knitting, 1991


Wednesday, August 18, 2010

Laurel Leaves of the wooly sort

A note...

There seems to be some growing confusion in some groups about who wrote this pattern. So, to clarify – this pattern, and the entirety of this blog, was written by Beth Chamberlain, you can see my bio on the side.

This pattern is my own interpretation of an 1840s pattern, which did not work as published. I first used this as an exercise for a workshop on working with Victorian era knitting patterns. When I shared it here I never imagine how much interest there could be and that I would start something of a fad in some reenacting circles. I appreciate the interest, I appreciate the sharing of links to the blog, I would also appreciate being credited for my work.

As long as I am adding this note I would also like to draw attention to the note which was already at the bottom Pattern published for personal, non-commercial use only.” It’s a fairly standard concept in pattern publishing and use, you can use the pattern as many times as you want for yourself but as a soon as you start selling items from it it’s commercial production, I am not granting that right. If you’re thinking I won’t hire a lawyer to enforce it you’re right that I would have a hard time justifying that cost. If that thought came to mind, for this or any other published pattern, I urge you to reexamine your personal ethics. If someone would like to license the pattern to use it for commercial production contact me and I will consider it.


Knitting instructions are finicky creations. Proof reading them is like trying to make sense of a random string of letters and numbers.  Today it's not uncommon to find erratas for the patterns published in both books and magazines. In the 19th century they skipped the erratas and left it to the knitter to figure out what the problem was. Combine the barely existing standardization, each author using her own shorthand, and the seeming complete lack of proof reading and 19th century instructions can be more a puzzle than anything else. I like puzzles so every now and then I set down and try to figure out one of the mystery patterns. Sometimes it's just because I'm curious, sometimes because someone else has run into a problem. Instead of cramming my notes into my bookshelf where they help no one besides myself I'm going to try posting them in hopes of saving someone else from counting stitches and scratching her head. 

The first installment is the Laurel Leaf from Elizabeth Jackson's The practical companion to the work table, containing selections for knitting, netting and crochet work, published in 1845. In this case the Laurel Leaf was intended for a half square shawl but other versions of it show up routinely in 19th century (as well as 20th) for various other items. It's a nice simple, slightly open pattern, perfect for a newer knitter or for working in slightly dim light. Elizabeth Jackson was nice enough to provide an illustration of the beginning of a shawl. Sometimes illustrations bear no resemblance to the  pattern, sometimes the pattern bears no resemblance to the illustration. The later is the case here. The image looks like a leaf, her instructions don't.
In fact, her instructions just don't work. Her original instructions can be found at the link above, in the interest of saving space I won't repeat what doesn't work. The problems start with the very first row, the pattern requires an odd number of stitches, she started off right but then blew it in the increases on the first row. The shawl starts at the bottom corner with just three stitches. Increases are worked along each edge at every pattern row and rows 6 and 16 have a spare set of increases (one at each end) to accommodate the pattern. My interpretation:
Work a Purl row after each pattern row

Cast on 3
1.   s1 yo k1 yo k1
2.   s1 yo k3 yo k1
3.   s1 yo k5 yo k1
4.   s1 yo k7 yo k1
5.   s1 yo k9 yo k1
6.   s1 yo k5 yo k1 yo k5 yo k1
7.   s1 yo k1 k2tog k3 yo k3 yo k3 k2tog k1 yo k1
8.   s1 yo k2 k2tog k2 yo k5 yo k2 k2tog k2 yo k1
9.   s1 yo k3 k2tog k1 yo k7 yo k1 k2tog k3 yo k1
10. s1 yo k4 k2tog yo k9 yo ok2tog k4 yo k1

11. s1 yo k5 yo k1 yo k4 k2tog k2tog k3 yo k1 yo k5 yo K1

12. s1 yo k1 k2tog k3 yo k3 yo k3 k2tog k2tog k2 yo k3 yo k3 k2tog k1 yo k1
13.  s1 yo k2  k2tog k2 *yo k5 yo k2 k2tog k2tog k1* repeat to 12 from end, finish:yo k5 yo k2 k2tog k2 yo k1
14.  s1 yo k3 k2tog k1 * yo k7 yo k1 k2tog k2tog * repeat to 14 from end, finish: yo k7 yo k1 k2tog k3 yo k1
15.  s1 yo k4 k2tog * yo k9 yo k3tog* repeat to 16 from end, finish: yo k9 yo k2tog k4 yo k1
16.  s1 yo k5 yo k1 *yo k4 k2tog k2tog k3 yo k1* repeat to 6 from end, finish: yo k5 yo k1
17.  sl yo k1 k2tog k3 * yo k3 yo k3 k2tog k2tog k2*  repeat to 10 from end, finish: yo k3 yo k3 k2tog k1 yo k1

Repeat rows 13-17
If using this for a shawl I strongly suggest slipping the first purl stitch to give a nicer edge and balance the slipped stitch in the knit rows. Below are images of samples worked by my interpretation. They are worked in a lace weight wool (akin to the Shetland recommended in the pattern) and size 3 (modern) needles.

Pattern published for personal, non-commercial use only.